-Drawin' Postal
The Concept
Let the Postal Service make art for you!
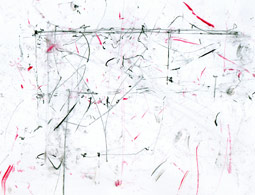
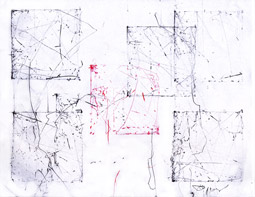
The idea is simple. All that needs to be done is rig up an apparatus that fits freely into a box, and and as the box gets moved around, an image is left behind representing the journey of the box through the postal system.
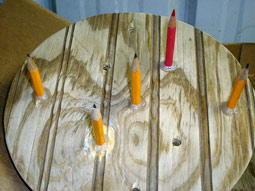
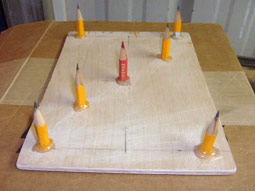
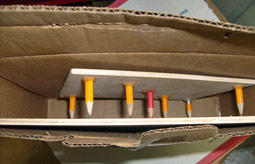
I made what I will call, a "stylus", to accomplish this task. The stylus is basically a thin piece of plywood with holes drilled in it for pencils to slide into. The stylus is then placed into a box with a piece of paper under it and shipped to a destination. As the box is shipped to its destination, and moved around in the process, the pencils draw "art" onto the paper below it.
Attempt #1 - How It Was Done
July 4, 2010
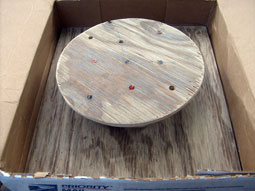
The first step was to find a box that was of adequate size. Once I found a box that I liked, I cut a piece of 3/8" plywood the same size as the bottom of the box. This way the pencils have a hard surface under them and something firm to press against. The bottom piece of wood needs to fit rather loosely though, it has to be able to move freeley in case the box is flipped upside-down or placed in an odd orientation.
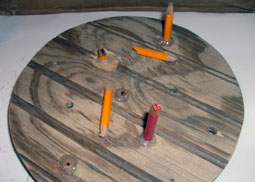
The stylus I made in this case is round so that it can move around inside the box without any issues. The pattern of the holes in the stylus were haphazardly drilled, although they turned out quite symmetrical. I ended up not putting pencils in all of the holes drilled, it just seemed like too many pencils/lines being drawn. The holes drilled were a size that allowed a very stug fit of the pencils, to make sure the pencils stayed in place I used some glue to help secure them even more. I made sure that in the end, the top of the stylus was just shy of touch the top inside of the box. I didn't want it to have much up and down room and risk breaking the pencil tips.
With the pencils glued into place, the stylus was now complete and ready for use. The bottom of my box was of a non-traditional paper size, so I cut a piece of posterboard down to the same size of the bottom to fit. I taped the cut piece of posterboard onto the bottom piece of wood and placed them into the bottom of the box. The completed stylus was placed on top of the paper, pencil points down. When I got to the post office I taped up the box, applied my destination label, and then sent it on its way...
Attempt #1 - Results
This package traveled approximately 250 miles to get from point A to be point B.
At some point along the delivery route the box was severly crushed, resulting in a majority of the pencils to break in half and all of the tips to break. I was fortunate enough to get at least
some drawing done before that tragedy occured. Next time I try this I will let them know the package is fragile.
Maybe that will help...
There are two ways to look at these results. One way is to look at the final product as a failure because it did not survive to create a true representation of the route traveled. The other is to see it as a success because an image was created by the process and even in the destruction of the stylus the product continued to be influenced. The "art" was created truely by its surroundings in this sense. I personally agree with the former.
Box: 11½" x 13" x 3½"
Paper: Posterboard - 11½" x 13"
Stylus: 8.25"Ø
Pencils: cut 2 ¾" - 4 regular, 1 red
Distance Traveled: ~250 miles
Drawin' Postal #2
July 20, 2010
This time I used a smaller box so that I could use a regular sheet of paper and so the pencils wouldn't have to be as long and lessen the chance of breaking. I disproved the myth that writing "fragile" on a package inceases its odds of destruction. This time I wrote "fragile" in big letters across the top of the box, and when the package arrived it was in perfect condition. Not even a single pencil tip broke!
I really like how this one turned out.
Box: 8½" x 11" x 3½"
Paper: Printer paper - 8½" x 11"
Stylus: 5½" x 8";
Pencils: 6 regular, 1 red
Distance Traveled: ~110 miles


